How to Give Admin Access to Mid-West on WordPress
Add a New User on WordPress
For business owners looking to partner with a web development company, adding users to your WordPress site is a crucial step. Simply log in to your WordPress admin dashboard, go to the “Users” section, and click on “Add New.” Enter the new user’s details, choose their role, and optionally send them an email notification. Save the changes by clicking “Add New User.” This process allows the new user to log in and contribute to your WordPress site based on their assigned role.
Step 1: Log in to your WordPress dashboard
Step 2: Go to the Users section

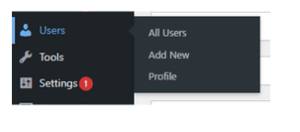
Once you are logged in to your dashboard, you can hover the mouse on the “Users” option in the sidebar and click on the “Add New” button to create a new user account.
Step 3: Fill in the user’s details
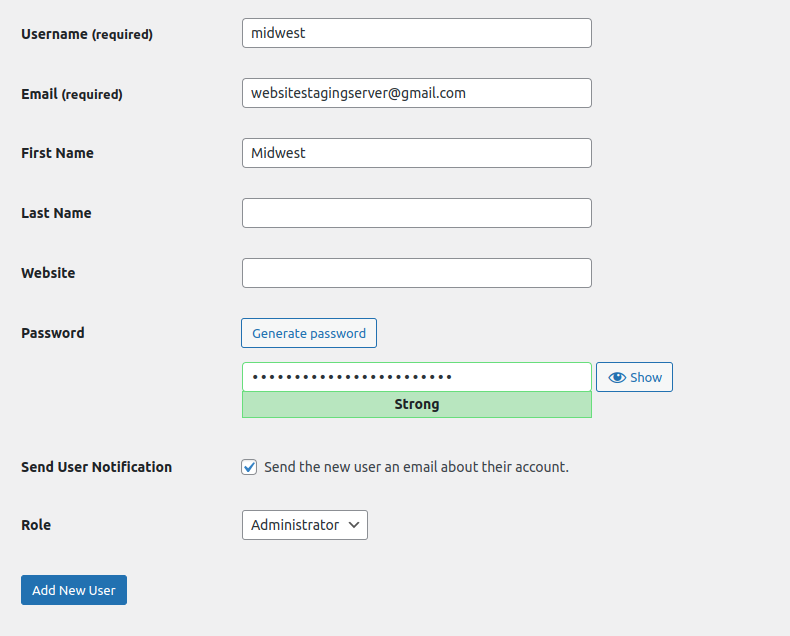
The next step is to fill in the user’s details as mentioned below.
Username (required): midwest
Email (required): websitestagingserver@gmail.com
First Name: Mid-West
Role: Administrator
In WordPress, the username serves as the login credential, while the email address is used for sending login details to the user. The name fields are optional and can be utilized to display the user’s name on your website.
One of the most important steps in adding a new user to your WordPress website is setting their role.

The role determines the level of access and permissions the user has on your website. There are five main user roles in WordPress, each with its own set of capabilities.
- Subscriber: A subscriber is the most basic user role and can only read content and leave comments.
- Contributor: A contributor can write and manage their own posts but cannot publish them.
- Author: An author can write, publish, and manage their own posts but cannot manage other users or access certain settings.
- Editor: An editor can write, publish, and manage their own posts, as well as manage other users’ posts and access certain settings.
- Administrator: The administrator role in WordPress grants complete access to the backend. This means that administrators can not only add and modify pages and posts, but they also have the ability to install plugins and themes, manage all the settings within WordPress, and modify other users’ accounts.
Choose the “Administrator” role so we will get full access to your website backend and check the existing website setup.
The next step is to choose a password for the user. You can either choose a password yourself or let WordPress generate one for you. It’s important to choose a strong password to keep your website secure.
Once you filled in all the required fields and set the user’s role, click the “Add New User” button to create the user account. The new user will receive an email with their login details and a link to log in to your website.
Step 7: Manage users
To manage all users on your website, utilize the WordPress dashboard. Simply navigate to “Users” and click on “All Users.” From there, you can edit user details, change roles, or delete accounts as needed.


